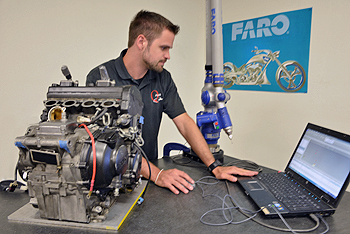
Dimensional inspection includes many types of scanning devices for a broad range of applications. In the realm of 3D Scanning, the level of detail that can be captured makes it the method of choice, especially for measuring very small objects requiring non-contact measurement methods.
Whereas contact 3D scanners collect measurement data by physically scanning the object with a device that comes into contact with every point on the surface, non-contact 3D Scanners collect immense amounts of data quickly without altering the geometry of the object. This is also an advantage for collecting measurements on the nano scale.
3 Types of Non-Contact 3D Scanning Methods
Laser-Scanning Confocal Microscopes
A confocal microscope uses a process called optical sectioning to collect images from various depths. These images can be reconstructed with a computer to create a 3D model of complex small objects. Unlike other laser systems, a confocal microscope only sees one depth level at a time, which allows it to generate a highly controlled depth of focus for very small objects with tight tolerances.
White Light Interferometry
This non-contact measurement system allows you to obtain surface measurements at the nanometer level. The technology behind white light interferometry uses wave superposition to measure distances based on data collected about reflected wave interactions. Interferometers can also be combined with microscopes to measure very small objects. Because they rely on the detection of waves and not optical images, interferometers are also useful for measuring objects with reflective surfaces.
Chromatic Confocal
Like interferometry, chromatic confocal also uses white light to collect measurement data. However, whereas interferometry uses the superposition of waves after they are reflected off the object, chromatic confocal measures the wavelength as it hits the surface of the object. This method produces more reliable results when measuring surface roughness or step-height depth, due to the minimum mathematical calculation required. The tolerances of large objects may allow the use of a thin whitening spray to facilitate scanning but the geometry of very small objects could be potentially buried by it. Fortunately, all of these methods work well with various types of surfaces from reflective to absorbent.
If you require any of these types of 3D Scanning methods, or if you're not sure what you need, the experts at Q-PLUS Labs are here to help. We'll work closely with you through every step of the process to ensure that you get the best results for your application. Contact us anytime if you have questions, or if you're ready to get started, call us today.


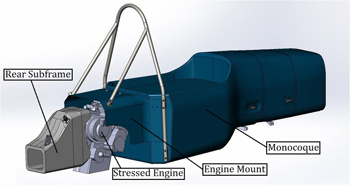
 Fullerton's SAE uses a Yamaha R6 Motorcycle engine, a large displacement choice for the 610cc class. The car's design utilizes the R6 engine as a stressed member to connect the drivetrain to the cockpit. This type of engine design requires the chassis to work with the engine as an active structural element of the chassis to transmit forces and torques, rather than using standard anti-vibration mounts to passively contain it. The R6 engine was chosen based off its high power output and ability to be used as a stressed member. In conjunction with suspension design and tire selection, the engine weight works well to keel the tires while heated under the track's conditions.

