Q-Plus Labs

Sitemap | Contact Us 

Dimensional Measurement Blog

Q-PLUS Labs Case Study: GQ Moto Inc., 3D Scanning Takes Entrepreneurial Ideas from Designs to Finished Products

Posted by Mike Knicker on Jan 30, 2018 1:41:17 PM

 Q-PLUS Labs Case Study GQ Moto Inc., 3D Scanning Takes Entrepreneurial Ideas from Designs to Finished Products.jpg

Often times, necessity is the mother of invention. Many products are conceived out of necessity, while there are products which occur from what may seem like serendipity. With the prevalence and popularity of 3D printing among a variety of users, from elementary students to precision machine shops, the ability to develop products is becoming a more appealing and accessible process. But how does what starts as a design concept make it to the finish line as a final product? After all, an idea is only as good as its execution. Q-PLUS Labs uses 3D scanning to help with this process for the founder of GQ Moto Inc., who intends to show the story of an invention's journey, from idea to production.

Introduction

George Parstch, a pre-med student and business student turned inventor and patent holder is familiar with the dilemma of having an idea and figuring out how to execute on it. He's encountered this scenario quite a few times in his career – at least eight, to be exact. Most of these ideas came from his experience in a wide variety of fields from personal stylist and wardrobe consultant to medical device engineer. Parstch envisions bringing eight unique products to market while showing people how they can do it too through video documentary of his design's journey through development to delivery of the finished product.

Our Process
EDIT_IMG_1108_SMALL.jpg

Parstch approached Q-PLUS Labs seeking 3D scanning expertise for reverse engineering some of the prototypes he's developing. 3D scanning provides two main benefits for product development. One is reverse engineering which allows you to obtain the exact dimensions of an object so you can replicate it or in this case, improve upon it. The second benefit that 3D scanning provides for product development is dimensional inspection which aids in comparing the actual condition of a manufactured part or component to the nominal condition as defined by engineering drawings and blueprints, metal or film templates (decreasingly), digital files and 3D CAD models (increasingly), or even a master tool or part.

With a step by step documentary on how to bring new products from concept to completion, Partsch seeks to creatively innovate products used on a daily basis from menswear to children’s sports equipment. His background in medical device design, also has enabled him to develop a device that is more custom fit and functionally appealing to the user or consumer than what is currently available on the market. Q-PLUS Labs’ 3D scanning expertise enables companies like GQ Moto Inc. to get what they need for their design concept or refining their finished product. If you’d like more information about how we can use 3D scanning services as well as a wide variety of dimensional measurement services to help with your current idea or manufacturing process, click here to schedule an assessment.


New Call-to-action


Read More

Topics: dimensional inspection, reverse engineering, 3D scanners, 3D Scanning, 3D scanning equipment, case studies, 3d scanner, case study

How Does It Measure Up: CMMs vs. Articulating Arms

Posted by Mike Knicker on May 31, 2017 4:18:18 PM

 How Does It Measure Up CMMs vs Articulating Arms.jpg

How are your measurements adding up? Do you need automation combined with a high level of accuracy? Or perhaps, your application demands a portable measurement device for its ability to reach difficult to measure features? With the ever growing need for accurate measurements in a rapid paced manufacturing industry, knowing the best type of universal 3D dimensional measurement device available for your application will help streamline both your manufacturing and quality inspection processes. 

What is a CMM?

Coordinate Measuring Machines (CMMs) are mechanical systems that use measuring transducer technology to convert probe and physical measurements of an object's surface into electrical signals that are then analyzed by specialized metrology software. There are many different types of CMMs; cmm_descrip.jpgthe most basic systems use hard probes and XYZ read-outs, while the most complex employ fully automated continuous contact probing. For a system like a bridge CMM which uses this set of axes, each axis is used to indicate the system's position or location in space. The probe head determines the values on the Z-axis by moving up and down the system's bridge. The system's Y-axis determines its values by moving over the entire CMM's base. The values for the X-axis are determined by moving back and forth across the bridge.
Stationary CMMs such as bridge type CMMs, provide quality assurance with efficiency, accuracy, and flexibility due to their programmability. They can be set up for automated, repeated measuring tasks which do not need to be reprogrammed each time. In general, CMMs come with a wide array of sensors and probes and are ten times more accurate than articulating arms. However, due to the sensitive nature of these measuring instruments such as contact and vision-based probes as well as vision and laser sensors, which comprise most CMMs, a temperature and humidity controlled environment is an important factor to consider prior to incorporating a system into the quality inspection process. Unlike articulating arms which offer portability, CMMs are usually stationary or cumbersome to move. Also, there are a number of different software programs that run the machines, which would mean a significant investment in training CMM operators.

What is an Articulating Arm?

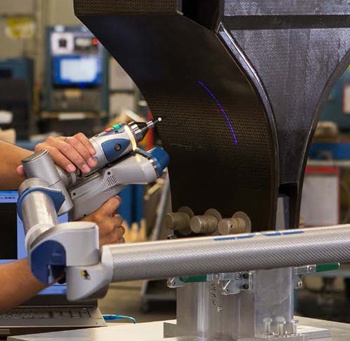
An articulating arm is a type of CMM that uses rotary encoders on multiple rotation axes instead of linear scales to determine the position of the probe. These manual systems are not automated, but they are portable and can reach around or into objects in a way that cannot be accomplished with a conventional CMM to perform 3D inspections, tool certifications, CAD comparison, dimensional analysis, reverse engineering, and more. The movement of the articulating arm allows for ease of use, as well as a broader scope of measuring ability as it pivots at the wrist, elbow, shoulder, and base of the system. The encoders at the system's base triangulate the location of each joint to the probe tip in 3D space.

articulating_arm_descrip.jpg

The measurements of very large parts can be easily accommodated by moving the articulating arm into another location around that part. The system's robust software is able to compile the measurement data from these individual locations and stitch all the data together to extend the measurement volume.

The ability to easily transport a highly accurate system such as an articulating arm allows users to take measurements onsite and in difficult to reach scenarios, without having to disassemble parts or transport large and heavy parts onto a fixed base. Improvements to articulating arms also include the integration of laser line scanners in combination with the traditional touch probe, thereby allowing the system to seamlessly scan across a diversity of surface materials, including those with high contrast, reflectivity, and geometric complexities. Unlike fixed CMMs, the probe of an articulating arm is not restricted to travel within the extent of a confined measurement bed. However, compared to the CMM which can be programmed to automate measurement, the articulating arm is manual and dependent on the operator to take measurements by moving the probe to each location on the part, and produces measurements which are generally less accurate than the fixed CMM. Operators will also have to learn to adjust to the motion of using the articulating arm, as it is fixed to a base.

Consider All Factors

There is not a single particular factor that will determine if a CMM or an articulating arm is best suited for your specific application. However, factors to consider that will inevitably affect the final decision will include:

  • Accuracy of measurement results
  • Portability of the system
  • Size of the parts being measured
  • Features that will be measured
  • Degree of automation required during measurement
  • Cost of the system
  • Cost of training operators

Q-PLUS Labs has been a leading dimensional measurement laboratory since 1987 and, in addition to its wide array of services and products, specializes in helping companies find the right measurement solutions to meet their needs. Contact us for answers to your dimensional measurement and inspection questions or to request a quote.

New Call-to-action


Read More

Topics: dimensional measurement, dimensional inspection, 3D scanners, dimensional inspection equipment, CMMs, articulating arms, 3D scanning equipment, Faro Arm, dimensional measurement services, measurement services,, coordinate measuring machines, metrology lab

3 Nano Measurement Factors to Consider for Dimensional Inspection

Posted by Mike Knicker on Apr 25, 2017 1:37:26 PM

 3 Nano Measurement Factors to Consider for Dimensional Inspection

As technology in our world progresses exponentially, the demand for more precise measurement requirements grows as the components manufactured within these products become smaller and smaller. If you are manufacturing products with extremely small dimensional measurements, you may need to consider nano-measurement technology in order to ensure that your products are meeting the tight tolerances required in today's precision driven world.

How Small Can Nano Measurements Be?

Measurements in the billionths of a meter are considered to be nano scale. In order to maintain accurate measurements at the nano scale, it is important to know that you have the right equipment to meet your needs. A useful rule of thumb for evaluating a solution is that the measurement equipment's accuracy should be 10 times better than the dimension you intend to measure.

Since there are generally two main methods of performing nano measurements, you may find that you need to perform a trade-off between the accuracy of the measurements and the speed at which they are acquired to find the best fit equipment for your unique situation. When measuring at this small of a scale, understanding what you need from your measurement results is the first step in the process of choosing the solution for your application.

What Are the Types of Nano Measurement Technology?

In general, there are two main types of nano measurement equipment, contact based and non-contact based; each with its own advantages to consider based on the application it will be used for. Non-contact based techniques use light to measure the surface characteristics of a part, and typically provide a much faster measurement because they do not need to physically come into contact with the part being measured. There is also no risk that a small part will be moved or damaged during measurement with a non-contact based system.

By comparison, contact-based nano measurement techniques are typically better for high resolution measurements on surfaces with a high aspect ratio; such as surfaces with features like holes, slopes, steps, or sharp edges. As these contact-based nano measurement solutions have been around for some time now, they are a trusted method of inspection and provide highly accurate 2D measurement data.

How Do I Balance Cost vs. Time Expenditure?

It is no surprise that accurate inspections at the nano level are expensive and take time, but they are critical to ensure your product's success. You will need to decide if it makes more sense to purchase the equipment you need in order to perform the measurements in-house, or to rely on a trusted dimensional inspection lab to perform the measurements for you. Having your own in-house measurement solution by purchasing equipment provides the benefit of taking less time, especially for repetitive measurements. However, equipment can be costly, and training your employees may take a considerable amount of time.

Conversely, using a lab to provide your measurement information supplies you with a team of experienced specialists, performing your dimensional inspection without the outlay of purchasing equipment and maintaining costly training for your employees. These experts will very likely have greater experience than your own employees could acquire, however, the data provided from the measurements may take time depending on the lab's availability and scheduling.

Q-PLUS Labs is your dimensional metrology partner with the experience, training, and equipment necessary to ensure that your dimensional measurements, small or large, are right every time. Whether you are looking to buy the necessary dimensional measurement or surface profilometry equipment to provide your data, or you are searching for the right lab to perform complicated measurements on your behalf, Q-PLUS Labs is the right place to turn to for the advice and skills you need.

Q-PLUS Labs has been a leading dimensional measurement laboratory since 1987 and, in addition to its wide array of services and products, specializes in helping companies find the right measurement solutions to meets their needs. Contact us for answers to your dimensional and inspection measurement and inspection questions or to request a quote.

New Call-to-action


Read More

Topics: dimensional measurement, dimensional inspection, dimensional inspection equipment, dimensional measurement services, nano, measurement services,, nanomeasurements

3 Surprising Facts about Dimensional Inspection

Posted by Mike Knicker on Nov 30, 2016 2:22:19 PM

 3 Surprising Facts About Dimensional Inspection.jpg

When you think about your daily life the topic of dimensional inspection will likely never come up. In fact, many people could go through their lives not understanding how dimensional inspection works, let alone how it fits into almost every aspect of their daily lives through the products they use. From the coffee cup that you may be holding right now as you read this article to the car you drive (hopefully not while you are reading this article), dimensional inspection was an integral part of the manufacturing process for all of the products you use in your daily life.

What Is Dimensional Inspection?

Simply put, dimensional inspection is the measurement of the distances between different features on a part. If you have a block that is supposed to be one inch long, then dimensional inspection will tell you exactly how long that block actually is. This is a simple case, but think about the intricate measurements required to make sure that each individual part of your car engine will fit together properly in order to move the pistons for you to be able to drive your car.

Even your simple water bottle needs to have very close dimensional measurements in order for the bottle top to screw onto the bottle and provide a tight seal for the water; if the dimensions are not correct then you may have trouble storing the bottle without spilling its contents, or even have an issue trying to fit the lid back onto it once you’ve removed it. This ability of the parts to connect correctly is designed into the dimensions of each part, but dimensional inspection of the individual parts to make sure they meet the design is what ensures the end product will work when it gets to you.

When it is not feasible to measure each dimension on each part, (for instance water bottles would become very expensive), dimensional inspection is used on the tools that make the parts such as injection molding dies that form a water bottle out of molten plastic. If the tool dies are ensured to have the right measurements, then the resulting bottles will be correct; a company can then check a sample product at intervals to make sure that the forming process is working properly as it progresses. So even then dimensional inspection is used on a sample basis.

Dimensional Inspection: 3 Surprising Facts

It should no longer surprise you that dimensional inspection is found throughout the manufacturing processes of almost every product that you use to ensure the safety and integrity of those products, but there are still some facts about dimensional inspection that you might find surprising.

  1. Tight tolerances: Dimensions are never measured to exactly what the design measurement should be (called the nominal dimension) so each design will have a tolerance on the dimension; basically, a stated amount that the dimension can be different from the nominal dimension. So, if you have a measurement that needs to be at one inch, but can be different from this measurement by one-sixteenth of an inch, your tolerance would be +/- (plus or minus) one sixteenth of an inch. In some industries, such as the space industry that builds satellites or parts for the space station these tolerances can be very tight, such as one ten thousandth of an inch (0.0001”) in order for the parts to work reliably in the space environment. This is for the safety of the astronauts or for the reliability of the satellite since you cannot fix a problem once in orbit.

  2. Tighter measurements: A general rule of dimensional inspection is that the dimensional measuring equipment should be ten times better than the tolerance being measured. That means if you are measuring something to the nearest inch your measuring equipment needs to be able to measure to one tenth of an inch. For the above example, if you are measuring to one ten thousandth of an inch (0.0001”) your measuring equipment needs to be accurate to one hundred thousandth of an inch (0.00001”). So, dimensional measurement equipment can be extremely accurate.

  3. Calibration: Equipment for dimensional inspection needs to be checked on a regular basis to make sure that it is still measuring as accurately as it is designed to measure. This verification is done against a very accurate standard part or specimen that has been designed and verified to a certain dimensions and tolerances. By ensuring that the dimensional equipment measures the standard correctly you can be confident that the equipment is functioning properly. Most of these standards are traceable back to the National Institute of Standards and Technology (NIST), which is part of the United States Department of Commerce, but is a non-regulatory agency. NIST is the foremost measurement standards laboratory and is used as the standard for calibrations in most industries.

Dimensional Measurements: In-House or Outsourced

While many companies keep all of the equipment they need to perform all of their dimensional inspections sometimes the equipment is so expensive, and the measurements taken so infrequently, that it makes more sense to have an expert laboratory do the measurements for you. In either case the experts at Q-PLUS are the place to turn for either help on the right equipment to purchase, or the accurate tools to measure your most intricate dimensions and the skilled operators to run that equipment.

Q-PLUS Labs has been a leading dimensional measurement laboratory since 1987; providing one place for precision measurement solutions. As a lab registered to ISO 9001 and accredited to ISO 17025, you can be certain that you will get the right dimensional measurements and calibrations every time.

New Call-to-action


Read More

Topics: dimensional measurement, dimensional inspection, dimensional inspection equipment, dimensional measurement services, nano, measurement services,, nanomeasurements

Nano measurements: 3 basic factors for determining the value of your measurement data

Posted by Mike Knicker on Nov 4, 2016 12:29:05 PM

 Nano measurements 3 basic factors for determining the value of your measurement data3.jpg

With the rapid development of technology comes the greater need for the increased accuracy in measurement capabilities that are able to keep up with the pace of products being manufactured at the nano level. For precise accuracy up to the micrometer, such as 3D measurement data of a needle tip or surface roughness measured to extreme accuracy, nano measurement is the logical solution for these intricate measurements. But how do you know if it is worth your time to invest in this specific measurement solution for your application?

Of course, every measurement technique has its challenges, and with the various methods of nano measurement, there are generally three things to consider when choosing the best method for your application; specifically measurement accuracy, speed, and cost. While there are two main methods of acquiring nano measurement data, optical-based and contact-based, you will need to examine these three basic criteria when you are weighing your decision on which type of method to implement.

Accuracy of measurement

What benefit will this measurement data provide your application? To measure in the nano realm, there are two types of methods. One way is via contact-based methods of nano measurement which can give very high resolution measurements with high accuracy. This is due to the fact that they come in contact with the surface of the part being measured, so that certain features the probe comes in contact with can more easily be distinguish, and thereby measured accurately. However, parts that may become compromised if they come into direct contact with the measuring device would not be suited for this particular form of measurement.

This is only a general rule of thumb, however, as white light interferometry, a type of optical-based measurement, is one of the most accurate methods possible even though it does not come in contact with the measured unit.

Speed of measurement

If you are looking for a faster measurement solution, an optical-based method of nano measurement may be the best option, because this method uses light to take the measurement and does not physically come into contact with the surface that it is measuring. This process speeds up the collection of measurement data without the risk of surface damage, unlike what can be experienced with a probe used in the contact-based methods.

One drawback of these faster methods of measurement may be the loss of some resolution on surfaces with high aspect ratios; such as a surface with features such as steps, slopes, holes or sharp edges. These can be much more accurately measured with a contact-based method, but this will be more time consuming in order to protect the surface of the piece being measured.

Cost to measure

Of course different measurement systems will have different financial costs associated with them, and this will have to be weighed when choosing the right system to meet your needs. When making your decision on accuracy, precision, and speed you will need to keep in mind how much the measurement data will cost. Along these lines, the following are some things to consider:

  1. Will it be more cost efficient to purchase the equipment to perform your measurements in-house; or would it be better to outsource this activity to a lab that specializes in these measurements? If you manufacture a part in-house and need to perform repeated measurements, then it might be in your best interest to invest in the equipment and training necessary to do the measurements yourself.

  2. A major benefit of going to a lab for your measurement needs is the specialization that they have in performing these measurements with the appropriate training, experience and equipment to give you the data you need. Labs are fairly flexible and can be great assets for measurements of one-off parts as well as large ongoing jobs.

While you can make some adjustments to reduce the cost per part, such as reducing the sample frequency of measurements, ensuring that you get exactly the type of measurements for the data you are looking for is one of the best ways to reduce your cost overall.

Having difficulty getting started on your measurement project? Since 1987, Q-PLUS Labs has provided a one stop solution for precision measurements to our customers. As a leading dimensional measurement laboratory, we have been able to not only supply measurement services and calibrations as needed but also consult on, specify, integrate, and sell in-house measurement solutions to meet the many and varying needs of the manufacturing industry. As a lab registered to ISO 9001 and accredited to ISO 17025, we've built our reputation on providing objective, unbiased information whether it be from our lab services department or our metrology products division.

New Call-to-action


Read More

Topics: dimensional measurement, dimensional inspection, dimensional inspection equipment, dimensional measurement services, nano, measurement services,, nanomeasurements

What Types of Data Can Be Obtained from Nano Measurement?

Posted by Mike Knicker on Aug 11, 2015 2:01:00 PM

What Types of Data Can Be Obtained from Nano Measurement

Dimensional inspection is employed to measure a broad range of sample types in almost every industry imaginable. This same versatility is required at the nano scale, which is why ongoing effort is put into the development of new measurement technologies.

The combination of stylus profilometers, chromatic confocal technology, interferometry, and other types of sensors enables the collection of multiple types of data at the nano level. The ability to use various sensor types, sometimes even for the same sample, makes measuring objects with varying characteristics possible. For example, although using a stylus profilometer to measure an object with a soft surface may not be possible, an optical sensor can solve the problem.

Types of Nano Measurements

Some of the types of measurements that can be obtained at the nano scale include:

  • Form -  Micro gears and other small parts require precision shapes and contours. Complex 2D and 3D geometry can be captured at the nano scale with sensors that capture and process point cloud data.

  • Roughness - Surface roughness is one of the most common applications for nano measurement. In this case, the type of measurement technology used will depend on the height difference between the highest and lowest points on the surface, whether the material is hard or soft, and the type of results required for the application in 2D or 3D.

  • Flatness - The flatness of a pane of glass or man-made sapphire can be measured, regardless of the reflectivity of the surface. When chromatic confocal technology is employed, even the flatness of the opposite side of the glass can also be measured through the translucent material.

  • Coplanarity - For a Ball Grid Array (BGA), the top of each solder ball needs to be coplanar with all the others so the mating component seats properly and all connections are made. The geometry of these parts can be measured and verified at the nano scale.

  • Roundness - Micro gears and other small parts require precision shapes and contours. The geometry of these parts can be measured and verified at the nano scale.

  • Thickness - The thickness of wafers, plastic films, and epoxy films are examples of applications for which nano measurement is often employed. With a chromatic confocal sensor, the thickness of translucent objects, like the glass face of a smartphone, can be determined.

These are not the only types of measurements that can be obtained at the nano scale. The use of multiple types of sensors and the ongoing development of new nano measurement technology are continually expanding the possibilities for manufacturers and researchers.

If you require any of these types of nano measurements, or if you're not sure what approach is needed, the experts at Q-PLUS Labs are here to help. We'll work closely with you through every step of the process to ensure that you get the best results for your application. Contact us anytime if you have questions, or when you're ready to get started.

New Call-to-action

Read More

Topics: dimensional inspection, nano measurement,, nano scanning,, optical sensor, nanoscale,, surface finish analysis,

Top 7 Applications that Benefit from Nano Measurement

Posted by Mike Knicker on Apr 14, 2015 12:45:00 PM

Top 7 Applications that Benefit from Nano Measurement

The development of new ways to measure objects and surfaces at the nano scale has allowed dimensional inspection providers to improve both accuracy and speed. It has also enabled the measurement of larger samples and objects with different surface types, as well as provide better 3D imaging capability.

Advances in nano measurement are interesting from a scientific perspective, but they also offer practical benefits in a number of different areas.

7 Applications that Benefit from Nano Measurement

Some of the applications that can benefit from better nano measurement include:

  1. Dental - Orthodontic brackets with very small features are difficult to accurately measure with contact probes and vision systems. The use of chromatic confocal technology enables better data collection because stylus size is not an issue, it measures in 3D without contacting the part, and the results are not impacted by reflectivity or translucence.
  2. Forensics - The ability to measure fibers and tool marks with greater accuracy gives forensics professionals better resources when processing evidence. Even specimens without parametric geometry (such as tissue samples) can be modeled in 3D.
  3. Microelectronics - Circuit boards at the micro and nano scale must be measured for quality control to ensure that the conducting path is consistent with specifications and that the wire bonds are correctly oriented. Because the samples are so sensitive, they must not be destroyed during the measurement process, which is why a non-contact system is the best solution.
  4. Medical - Artificial joints, implants, and other medical devices require highly accurate surface geometry to perform at their best. Measuring surface form and roughness at the nano scale ensures that the specifications are met. Nano measurement can also be used in the development and manufacturing of surgical instruments.
  5. Printing - Nano measurement is used to determine the surface roughness of different types of paper. It can also be employed to analyze printing results and detect errors.
  6. Tools and machining - Micro tools and components require a high level of accuracy to operate correctly. Nano measurement can be used for detecting tiny flaws in a micro gear, for measuring form, or for determining the amount of wear on a part.
  7. Material science - The ability to accurately measure a broad range of surface types at the nano scale, without risk of damaging the sample, is a valuable addition to the material science industry. Even materials with differing reflective properties can be measured with the same device.

The list of potential applications goes on and on. Automobiles, injection molding, and plastic films are just a few more examples of the types of industries, processes, and products that can benefit from new nano measurement technologies.

Q-PLUS can help you with your nano measurement needs. We regularly work with businesses in almost every type of industry, so no matter what your application is, we have the experience and expertise you need to get accurate results. Contact us today to schedule your free consultation.

New Call-to-action

Read More

Topics: dimensional measurement, dimensional inspection, nano measurement,, nano scanning,, nanoscale,, surface finish analysis,

Dimensional Inspection Services: More than Just Measurement

Posted by Mike Knicker on Nov 18, 2014 10:00:00 AM

Dimensional_Inspection_Services_More_than_Just_Measurement

Although accurate and precise measurements are key components of dimensional inspection services, these are not the only qualities you should look for in a provider. You want a partner that can help you solve problems and identify potential issues that you may have not yet recognized.

The manufacturing process is full of potential pitfalls, especially when you are trying to develop a new product on a tight timeline. Employing a dimensional inspection provider you can rely on for more than just measurement will help you operate more efficiently and possibly cost you less money in the long run.

Dimensional Inspection Services: Beyond Measuring

Whether you are implementing a new manufacturing process or trying to improve existing systems, dimensional measurement is an integral part of the solution. A partner that can do more than just provide technical services will help you operate efficiently and cost-effectively. Some of the qualities to look for in a dimensional inspection services provider include:

  • Forward thinking - The manufacturing process requires many steps, and to get it right the first time, you must have foresight and think strategically. Look for a provider that is invested in the whole process, not just the measurement tasks you require.
     
  • Attention to detail - Even the smallest cut corner can have a major impact on a manufacturing process, which is why working with a provider that is as committed to the little details as you are is so important.
     
  • Industry expertise - Almost any engineer can perform basic dimensional inspection with a little training. In fact, there are many reasons engineers benefit from learning more about metrology. However, dimensional inspection in the context of the manufacturing world is a different story. You need a partner that understands industry-specific requirements and manufacturing methods, and can interpret engineering drawings.
     
  • Embrace of technology - Metrology technology and equipment are constantly evolving, which means there are always new ways to do the job better, faster, or in a more affordable manner. Look for a partner that stays on the cutting edge of dimensional inspection technology so you can reap the benefits.

Q-PLUS Labs has the expertise and experience you need in a dimensional inspection partner. With almost 30 years in the business, we have worked in a broad range of manufacturing environments in all types of industries. Our trained staff can help you recognize potential problems and identify ways to improve your processes. Contact us today to schedule a free consultation.

What qualities do you look for in a dimensional inspection services partner?

New Call-to-action

Read More

Topics: dimensional inspection

5 Predictions for the Future of Dimensional Inspection

Posted by Mike Knicker on Dec 1, 2013 10:38:42 AM

dimensional-inspection-predictions-resized

Although the principles and science of metrology have not changed, the world of dimensional inspection is always evolving. Advances in technology and a changing political landscape will influence the direction of the industry and play a role in the technology available to manufacturers. Preparing for these changes can help ensure that manufacturers can be confident that metrology labs provide the best service possible.

5 Predictions for the Future of Dimensional Inspection

1. There will be an increase in the use of 3D scanning.
Of all the technologies used in dimensional inspection, 3D scanning is one of the least mature despite how long it has existed. However, it is a proven technology that is rapidly becoming more widely known and accepted. Although 3D scanning is not likely to make other technologies obsolete, it is quickly becoming an essential tool for manufacturers that need dimensional inspection.

2. The United States will need more dimensional inspection capability.
Globalization has changed the manufacturing industry in the United States, but the pendulum is swinging back. According to the
Bureau of Labor Statistics, U.S. employment in the manufacturing sector has been steadily on the rise since 2010. Several factors contribute to the shift that is starting to occur:

  • Labor rates are increasing in China, bringing manufacturing back to the U.S.
  • Quality concerns are driving manufacturers to desire more control over manufacturing processes and quality.
  • Shipping times influence where a product is manufactured.
  • Strides in automation have made manufacturing in the U.S. more affordable.
  • The U.S. economy is gradually improving. 

3. More engineers will be required to provide these services.
The trend toward bringing manufacturing back to the United States means more metrology services will be required, which means that more engineers will be needed to perform these services. This increase in demand translates into more metrology courses at universities and better technical facilities for students. The end result for manufacturers is a larger pool of talent with better dimensional inspection skills.

4. Accuracy requirements will become increasingly more stringent.
As technology evolves, regulatory and quality requirements have become more and more stringent. This trend is only expected to continue, which means working with a provider that can meet increasingly high standards will be more important than ever for manufacturers.

5. New technology will continue to be introduced to the industry.
New technologies from the private sector will continue to be adapted and adopted by dimensional inspection departments and providers. These technologies are expected to be better, faster, and more cost-effective. Some of this technology will be bold and game-changing. 

What does all of this mean for people performing dimensional inspection? We must be prepared to adapt to the changing landscape by being open to new technologies, by supporting the educational institutions that will produce the next generation of engineers, and by ensuring that we have the capacity to respond to the increasing demand and complexity in the industry.

What do these predictions mean for manufacturers? You want a lab that has their finger on the pulse of the industry. Talk to your metrology provider about their approach to new technologies and the changing landscape of dimensional inspection. No matter what happens to the industry in the future, Q-PLUS Labs is committed to staying on the cutting edge of dimensional inspection. If you are interested in learning more about how our breadth and depth of experience can fill your metrology needs, request a quote today.  What are your own predictions for the future of dimensional inspection?

dimensional measurement assessment

Read More

Topics: dimensional measurement, dimensional inspection

Outsourcing Reverse Engineering? Answer These 7 Questions

Posted by Mike Knicker on Jul 19, 2013 5:59:00 AM

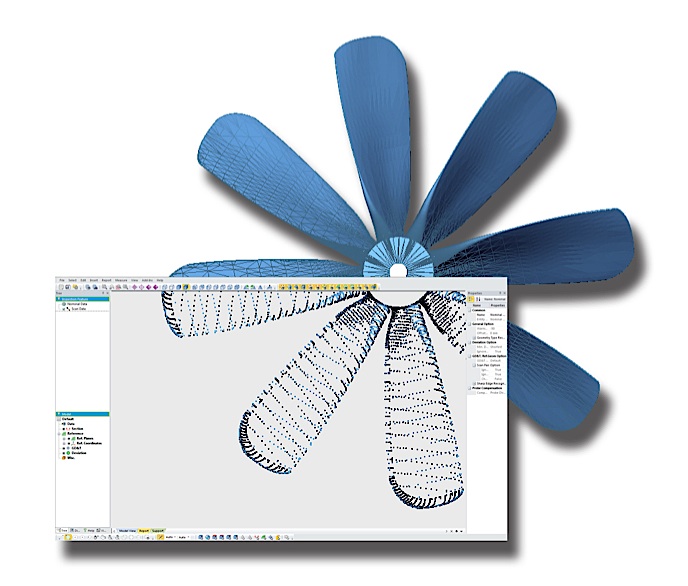
reverse engineering 3D fan

If you have decided that outsourcing reverse engineering services makes the most sense for your project or business, you still have some decisions to make. Not all reverse engineering applications are the same. You must decide what type of equipment to use and what kind of output you need, as well as consider a range of other factors.

This checklist is designed to help you get started.

7 Questions to Ask When Outsourcing Reverse Engineering

  1. What is the objective of reverse engineering? Your provider will need to know your end goals in order to help you make the most cost-effective decisions.

  2. What type of reverse engineering makes the most sense for your application? You can decide between design intent, verbatim (as-built), or a hybrid of the two. When reverse engineering for design intent, the measurements of the original object may be adjusted to correct for imperfections so that the final product will function in the desired way. The verbatim approach aims to create an exact replica of the original object, including imperfections, and the hybrid approach can be used in cases when the original object features multiple types of surfaces.

  3. How should you process measurement data? When gathering measurements to reverse engineer an object, you can use a dimension-driven approach, shrink-wrap surfaces, or a combination of the two.

  4. How accurate do you need to be? Depending on your objectives and the reasons for reverse engineering, your application might need a certain degree of measurement accuracy. For example, in the case of an object that must meet regulatory specifications, accuracy is extremely important. However, if you are replicating a statue for sale in a gift shop, some minor differences are acceptable. 

  5. Does the original object need to remain intact? In some cases, in order to get the most accurate measurements, the original object will need to be disassembled or even destroyed. If this is not an option for your application, your provider must know that at the beginning of the process.

  6. What type of equipment should you use? Many different types of measurement equipment can be used for reverse engineering. Your provider will consider the level of accuracy required, surface characteristics of the original object, and many other factors when deciding how best to take measurements.

  7. Do you need to measure the object in a constrained state? For some applications, measuring the object while in a state that simulates how it's shape will conform in assembly makes more sense. You might also need to measure other objects or parts if you are reverse engineering an item that is part of an assembly.

Your provider can (and should) help you answer many of these questions, so don't be afraid to ask.

One of the greatest advantages of outsourcing reverse engineering services to providers such as Q-PLUS Labs is that we operate across multiple industries. This means that we offer a broad range of equipment types and the expertise to handle almost any reverse engineering application. Contact us today to learn more or to get started on your next reverse engineering project.


Read More

Topics: dimensional measurement, dimensional inspection, reverse engineering, outsourcing, measurements, criteria, 3D scanners, metrology, 3D Scanning